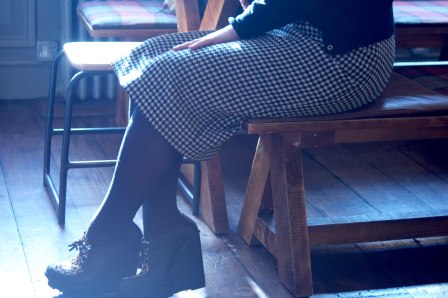
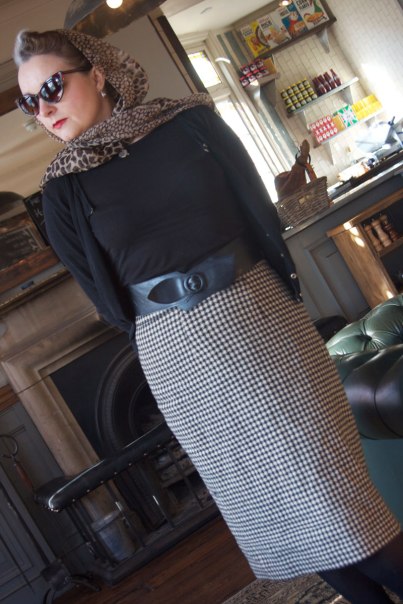
 The sun came out today. And the sky was blue. But it turned out to be a big trick and it was still bloomin’ freezing! But hey! Still managed to make good use of that light . . . in our ‘local’!
The ladies at the Thatched House were very accommodating and made us some lovely coffee. It was a genius plan.
The skirt is indeed made from an old throw that I got from and Oxfam shop a couple of months ago. I wasn’t sure if it would translate into a skirt because of its ‘blankety’ nature. But it turns out that it was completely the right move and I now have the warmest legs in town!
I think originally it might have come from one of those touristy shops in Regent Street. It’s 100% wool for sure.
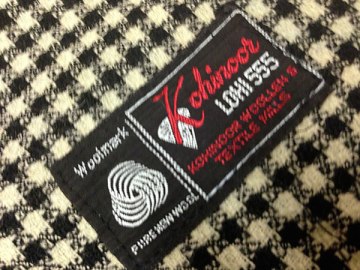 And even better still, there is just enough left to make a little vintage jacket (when I get a mo). Not bad for about £4!
The pattern for the skirt is self-drafted and constructed pretty much the same as the black pencil skirt I made here, but I added a little to the length and hand picked the zipper. Although it was cut from the same pattern, it is noticeably larger and I think that is due to the nature of the fabric. It has a lot of give which was great for matching the checks but not so good at being the right size. Could easily have lost an inch from round the waist. Hey ho… lesson learned!
What I did do, this time round was to document how I lined the vent. Now bear with! This might not be the clearest tute but I’m hoping it will give half a clue at least!
Prepare the back section of the skirt:
Sew the darts, iron fusible interfacing to the vent. Sew the back seam from the end point of the zipper opening to the top of the vent, pivoting at the corner and finishing about a cm before the edge (as shown). Clip into the corner. Insert the zipper by hand or machine.
 Cut your lining the same as your back skirt pieces but add a bit of extra ease at the side seams. On one of the pieces, invert the vent shape by folding over the extended part along the centre back seam and then cut round it but give yourself about a centimetre extra at the top of the vent. So, for example the extended vent piece on the left will be a cm taller than the removed piece on the right. Sorry, I knew I was going to be bad at this!
 Lay your pieces on top of the wrong side of your skirt as below. Hopefully it will make more sense. You might want to give them a bit of a press too!
Now take the right hand lining piece and flip it over onto the left side and pin down the centre seam. (See image below.)
Next, you need to sew from the bottom of the zipper opening, down to the red point as marked above.
Now, flip it back over so that the wrong sides of the lining are facing the wrong sides of your main fabric. You will begin to see how the vent lining fits now.
 The next part doesn’t translate visually well. So I will try to explain. You need to flip the lining back over again and pin the extended vent section of the lining to the corresponding piece of the main fabric, right sides together. Don’t pin through both vent sections. Just the top one.
 Sew the topmost vent to the lining from the point where the vent seam ends at the top, straight down to the bottom.
 When you flip the lining back over you will see it begin to take shape.
Now, I’m not sure the following image is very useful, but basically what you need to do is attach the lining to the remaining vent piece. Again, right sides together, pin down the edges.
 Now sew straight down from the white chalk dot as shown above. And clip all corners of lining as you will need to manipulate them to sit flat.
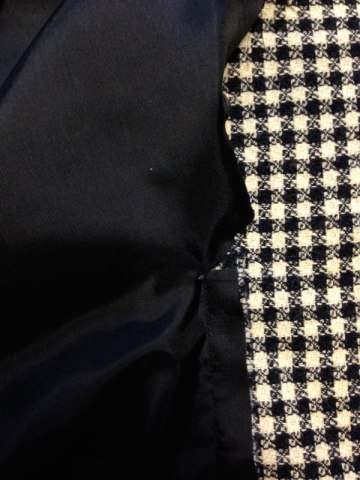 Twist the top part of the vent lining to sit flat and in line with the top of the vent. Make sure the matching piece on the other side is lined up too. Now pinch all layers together and pin securely:
 Stitch from the endpoints of your seams, through all layers of the vent section. When you turn it back over and give it a good old press, you should have something like this:
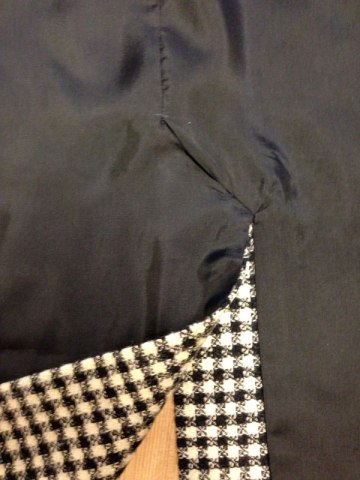 You can see that mine is far from perfect. It really is a bit fiddly but it will undoubtedly improve with practice and patience.
So there you have it. Sorry that the photos are so confusing. It doesn’t help that the fabric is mostly black! I do hope it helps a little to demystify the process though.
Mr Ooobop is doing a fine job of schmoozing with the brides- and grooms-to-be at Bluewater Wedding Fair this evening, to promote his band, The Redfords. I am immensely proud of him and so grateful for all the lovely photos he takes for me. It really is about time I made something else for him. It will come as no surprise to him that I am going to try a waistcoat. I say that because he has been giving me puppy dog eyes for soooo long and I can’t bear it any more!
I’ll leave you with a couple more shots from today. Night all x






Total glamour-puss! Your photo shoots really show your creations (and you!) to perfection. Great tute too! Thanks!
Thanks CP. Very lucky that Mr O is so into his photography. Kind of handy!
What a beautiful skirt. I never interface my kick pleats – will do so from now on!
Thank you Gail. You will really notice the difference. You only need use a lightweight fusible and it only adds a matter of seconds to the project!
Love it, and what a clever reuse of something quality for a bargain too! 🙂 Hey, when making Mr O a waistcoat, watch the length of it – I find they are often too short in the body. Probably something to do with the rise on trousers often being lower than on Planet Patternland? xo
Thanks MrsC. And thank you for that waistcoat tip. Its going to be a posh one to wear with his Tux so the trousers are nicely hoisted up with braces! I’m sure I’ll get tapped for a casual one soon after and I’m sure that will need to be made longer!
Isn’t it wonderful to have a chap willing to get down with his flamboyant self! 🙂 When fancy waistcoats were briefly ‘in fashion’, I made several for my then partner and I loved doing it. Now MrC is a big waistcoat fan – wears his three leather ones on rotation at the shop, and I susoect that once I get the pile of shorts made, that will be my next job. Puppy dog eyes can be very effective even from a 53 year old man hehehe.
Can’t wait to see what you make for the delicious clotheshorse that is your beloved!
Oooooh, best looking blanket I’ve ever seen! Thanks for posting the info on the vent, I’m going to print out your tutorial, as my next skirt project is a pencil skirt with invisible zip and a vent. (will be my first time with this).
lol… so cosy having my legs wrapped in a blanky! Good luck with your skirt. 🙂
Awe inspiring. Four pounds! Great skirt, even better photos. Very glam.
Why thank you! Will be an even better bargain when I get round to making the matching little jacket 🙂
Ooh la la, madame! You look amazing! Glamorous AND warm? That skirt is a winner x
Thanks so much Tilly. Clearly feeling ironic recently. Bought some cute Hush Puppy boots too, but we’ll keep that to ourselves!
Just what’s needed with the current uk weather! And stylish as ever. Thanks for the tutorial, lining vents has always been a bit of a mystery to me.
Thnaks Catherine. Absolutely. When I was finishing it off the sun was shining and for a minute I considered sewing a cotton spring dress in anticipation. Mmm a little optimistic I think!
Thanks for the great tut and photos on the kick pleat. I have never interfaced a kick pleat before but will in future as it looks crisper. I do love the photos of you in your lovely skirt and to think that skirt was once a blanket. Op shops are beginning to be a lot more attractive to me these days after seeing your creations.
You are most welcome. Just a little lightweight fusible on either side. Takes a few seconds and makes so much difference. I also interface the hem before I turn it up. Makes the skirt hang better. I like the surprise factor of stumbling across a nice piece of fabric in a charity shop but I still love to go proper fabric shopping of course!
Your skirt is gorgeous, and what a bargain on the fabric!
Thanks Lynne 🙂
Gorgeous! Extra points for great styling and the helpful tut’!
Thank you. Was a fun shoot! 🙂
Great skirt, very elegant and thanks for the helpful tute
Thank you so much 🙂
I love this look! The glasses, the gorgeous skirt (never in a thousand years would I think that was ever a blanket!) the scarf, super glam!
Thanks Jayne. I wasn’t totally convinced it would work until I’d finished it. Jolly glad it did. Though with this stupid cold weather I’d still have worn it whatever it looked like!
Wonderful outfit. The cats eyes totally work! Thanks for the tute too.
Thank you Sewing Elle. Those glasses are a great way of hiding tired eyes!
Ooobop…what else can I say, but YOU ARE SO COOOOL! You look so amazing in those shots at the cafe…what a knockout outfit! And those glasses! Beautiful skirt and what a lovely way to upcycle a throw…it literally looks like a million bucks. Thanks for the tut too – I’ve always wondered how to properly finish a vent! Will bookmark for future reference. Keep up the stellar work 🙂
lol… you are too kind, Kat. It took a lot of head scratching and procrastination before I mastered it but actually its really quite simple. I’m just very slow at ‘getting it’!
Nice skirt! It looks beautiful on you-so flattering! I love how you used an old blanket. Definitely my cup of tea. I’ve been experimenting in drafting my own custom skirt pattern and I think I’ve finally mastered a perfect fit. Look out world, I’m now taking over! 🙂
Here’s to a perfect pencil skirt!
Beth
Thanks Beth. I have to say I did think of you as I was making it. You are the queen of refashioning, after all! Well done on your drafting. It is so much more satisfying than a ready made one. Looking forward to seeing your new skirt.
Gorgeous! I can’t believe you got that fabric for £4.00! And I love the glasses. And the scarf. The whole look actually.
This is beautiful, I love the photoshoot too! Thanks also for sharing your lining tips ;o)
Aww… thanks Marie. You are most welcome. 🙂
Great skirt and photos! The tutorial is awesome too, I’m definitely going to give that a try on my next skirt.
Thank you Sanne. There’s no turning back once you’ve lined a vent! 😉
You’re so gorgeous – you always give off movie star vibes – I feel like you should be holding your hand out for us to kiss 🙂
Love the skirt – your taste & skill is impeccable, as always 🙂
*blush, blush* If only you could see me now! Jim jams, bed hair and that, really-no-make-up look! Kisses back at ya lovely, lady!
Some might say that’s the best look of all! ^_^
This is so gorgeous and glamorous but also cozy looking! I love your styling, and I have to try to do this on my next pencil skirt.
Thanks so much leafranqui. Quite a feat to get comfy and stylish. If only all high heels were like that!
Wow, you look gorgeous! Every time I see those head scarves I think Marilyn Monroe…
You’re amazing to be self-taught. Truly great shots. Cheers!
Thank you so much. Head scarves are great for covering up bad hair days too! 😉
Hi from Malta
first time I went into this blog. What a lovely skirt. I ,d love to sew again. stopped sewing but I still love to look at the Burda magazine now and then. You.re amazing.
dolores edwards
malta
Hi Doris. And thank you for your lovely comment. It’s such a wonderful sewing community on line. I started, and stopped sewing in my teens and have only picked it up again in my 40s! but I’m sure if I’d have had the support and inspiration from all the fantastic sewing bloggers back then I would never have had such a long break from it. Come join the gang! It is so much fun. Burdastyle.com is a good place to start uploading your projects also. 🙂
This is fantastically brilliant!!
Thank you Tracey x
Pingback: Old Throw – New Skirt!
It is fabulous skirt! I love it and you looks great in it. I have my standard skirt pattern which I use everytime – so I am sure it will be not the fist skirt you have made using this pattern.
Thanks so much for the tute – this is genius! That has done away with so many problems for me! I used to try and handsew the lining into place trying to make it fit by looking at it very gravely. Somehow, this method never really worked for me, so next time I will definitely use your instructions. Thanks again!
Pingback: Me Made May 13: My second week | ooobop!
Pingback: Me Made May 13: My third week | ooobop!